
Differential Pipettor Dispenser Diluter Manual
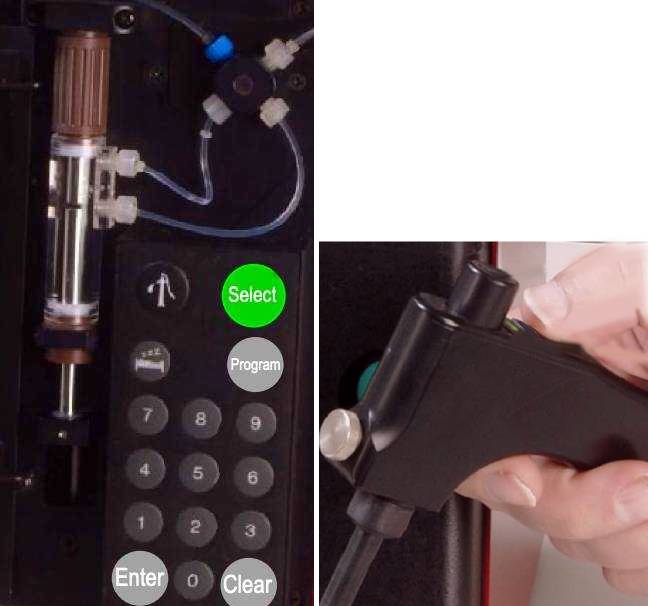
1. Setup & Connections
- Left (blue) connector: Connect tubing to the reservoir
- Right (clear/green) connector: Connect tubing to the probe
- Connect the probe electrically and power on the instrument (rear panel)
The pump will initialize and display “Ready”
2. Priming the System
- Press the Prime Pump button
- The system will prime automatically
3. Selecting a Program
- Press Select
- Display shows: first step of Program #1 (e.g., Disp 100.0 µL)
- Press Select again to scroll through programs
- OR enter the program number directly using the keypad
4. Running a Program
- Attach a new disposable tip to the hand probe
- Press and release the probe switch to run each step
Indicators:
- Green LED OFF: Step in progress
- Green LED ON: Ready for next step
- Beep sound:
- Signals step completion
- Indicates when probe can be moved
5. After Each Step
- The display shows the next required action
- Continue using the hand probe to proceed
Programming Functions
6. Entering Program Mode
- Press Program
- Display shows: Enter/Edit Program # (next available slot blinks)
7. Editing or Deleting a Program
- Enter the program number → press Enter
- Choose:
- Edit → modify steps
- Delete → permanently remove program
Notes:
- Edit mode: Step-by-step prompts appear
- Press Enter to confirm each value
- To change program structure, delete and recreate
8. Creating a New Program
- Press Program
- Accept the suggested program number → press Enter
- OR enter a different number → press Enter
- Display shows: “New Program”
9. Optional: Linear Regression Control
For sub-microliter accuracy:
- Select Slope Adjust ON → press Enter
- Otherwise select OFF
10. Programming Steps
Available functions:
- ReTip
- Aspirate (Asp)
- Dispense (Disp)
- Blowout (Blast)
- Rinse
- Other
How to configure:
- Use Select to scroll functions
- Press Enter to choose
- Follow prompts for volumes and speeds
11. Important Controls
- Enter: Confirms selections
- Clear: Deletes incorrect input (NOT a reset)
Summary
- Simple operation with familiar pipetting workflow
- Step-by-step guided execution
- High precision, even at sub-microliter volumes
- Flexible programming for custom workflows
When the top of the reservoir liquid and the tip opening are maintained at approximately the same level during operation, hydrostatic pressure effects are eliminated. This ensures that valve changes do not impact the precision or positioning of minute sample volumes within the tip.

Maintaining equal height between the reservoir liquid level and the tip is essential for optimal performance.
This height parity is particularly important when:
Performing the ‘6 Favorites’ procedure
Measuring sample heights in the tip for installation quality control
Working with volumes below 1 µL, where maximum precision is required
For volumes greater than 1 µL, height parity is less critical.
The reservoir bottle includes an H₂O fill mark at approximately 2 inches. When the hand probe is placed in its holster, the tip bottom aligns with this level.
This allows you to:
Keep the probe in the holster and bring samples up to the tip
Or, when using the hand probe separately, maintain the tip at approximately the same height as the H₂O fill mark
Maintaining this alignment helps ensure consistent, high-precision liquid handling.
© Allrights Reserved, 2026